 Tie dying paper is tricky as the paper is usually too fragile to be manipulated a lot, especially when damp. Knowing that the tea bag paper is strong when wet I suddenly thought that I could try things I might with a fabric but could then use it as a collage paper! Coooool!
I started out simple and gradually grew in confidence and then adapted my techniques in the way I treated and applied the cyanotype chemicals.
Making Tie Dye Cyanotypes
Step 1
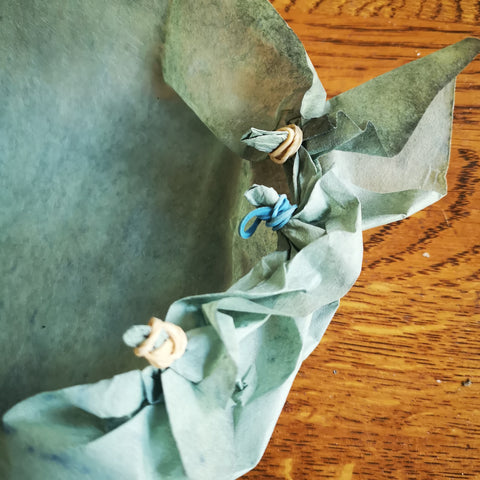
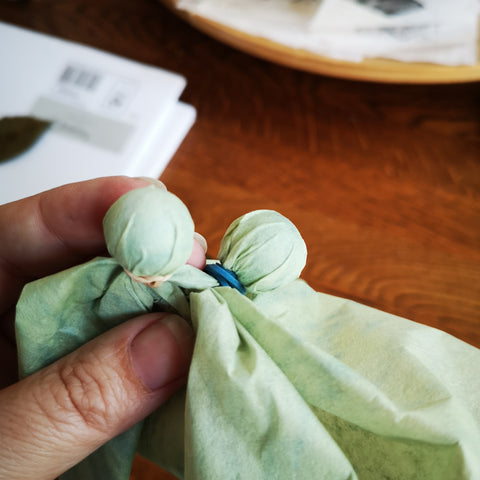
After coating the paper and allowing it to dry pinch little peaks of the paper and wind with small elastic bands. Fill the whole paper with pinched peaks.
Step 2
The paper can be left in the sun at this point but I chose to spray with water first. It was left to develop in the sun and was flipped over part way to allow hard to reach parts of the paper to catch some UV too.
Step 3
Once dry the elastic bands were removed and the paper rinsed until the water ran clear.
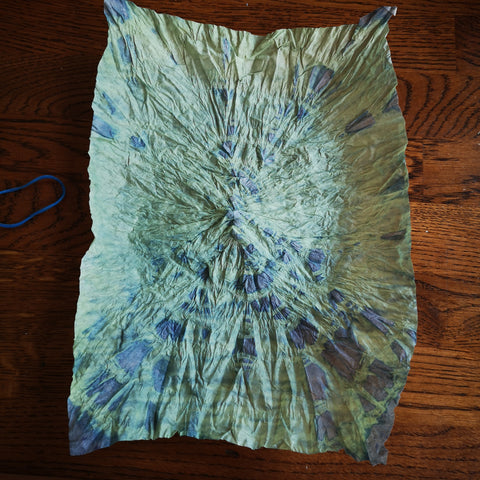
Final verdict
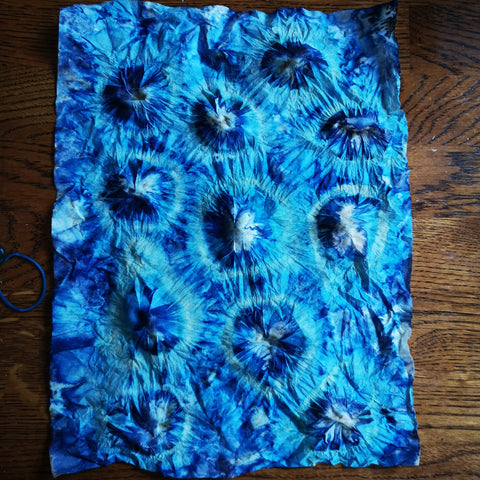
I was really pleased with this outcome particularly as a first attempt. The patterns were quite random and not very predictable.
Making an Alternative Tie Dye Pattern

Step 1
Take the coated sheet of paper and pinch in the centre to gather the paper together. Bind with elastic bands from the centre outwards in bands.
Step 2
Place in the sunshine to develop turning over at intervals.
Step 3
Remove the elastic bands. At this stage I could see there was going to be quite a large amount of white paper left after rinsing so to create a light shade of blue in these areas I exposed the paper to the sun just for a short amount of time, just a couple of minutes.
Step 4

To bring out the depth of the blue use a sprinkling of white wine vinegar to cover the surface and leave for a couple of minutes before rinsing.
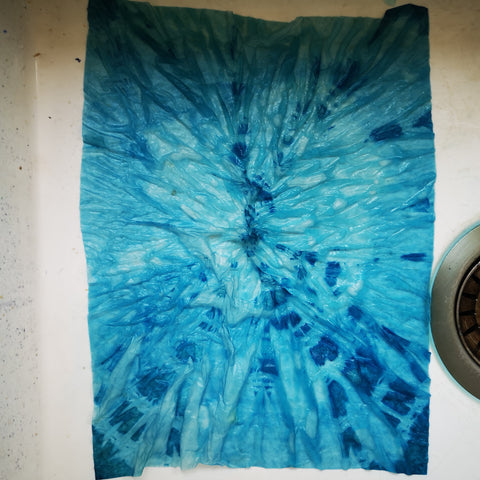
Final verdict
I can see with practice this could be good but I had too much white space, salvaged with a bit more developing after removing the elastic bands.
Marble Tie Dye Cyanotype (starting with treated paper)
Step 1
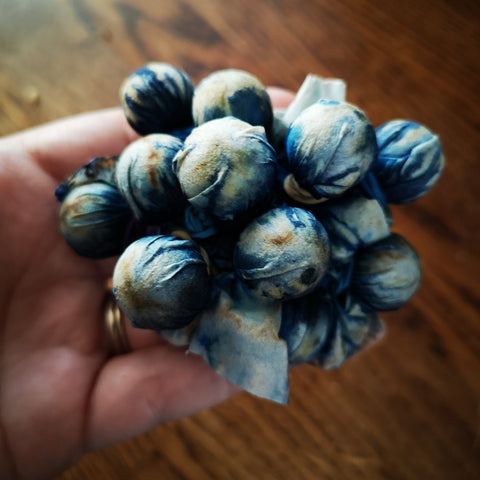
Place a marble beneath the tea bag paper and hold in place with a small elastic band, repeat all over the paper.

Step 2

Before allowing to develop, cover with dish soap bubbles and leave to dry and expose to the sun's UV. It was left to go really crispy!
Step 3
Develop until it is dry again then cover in white wine vinegar. I allowed it to dry fully again at this stage.
Step 4
Remove all the elastic bands and marbles and rinse.
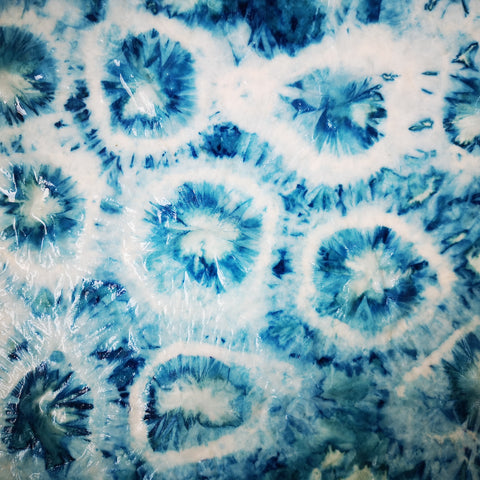
Final Verdict
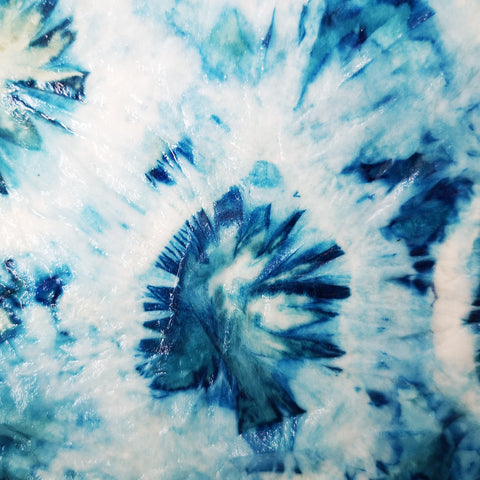
I LOVE this one! I really like the uniformity of the circle sizes and the small pleated details. Just by adapting how the paper is treated can change the outcome.
Marble Tie Dye Cyanotype with non treated paper
Step 1

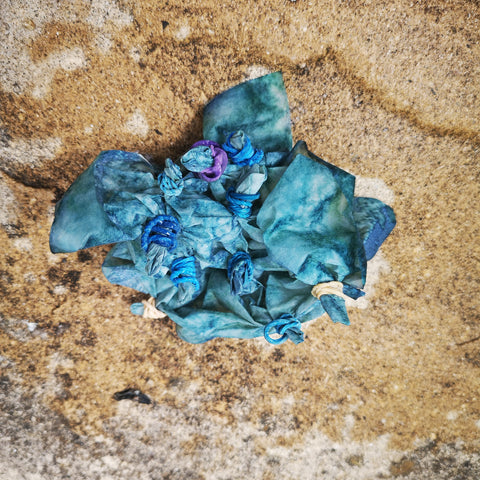
Using plain tea bag paper with no cyanotype chemicals on it tie with marbles as in the previous tie dye method.
Step 2
Once all the marbles are in place drip cyanotype chemicals over the marbles only. Develop.
.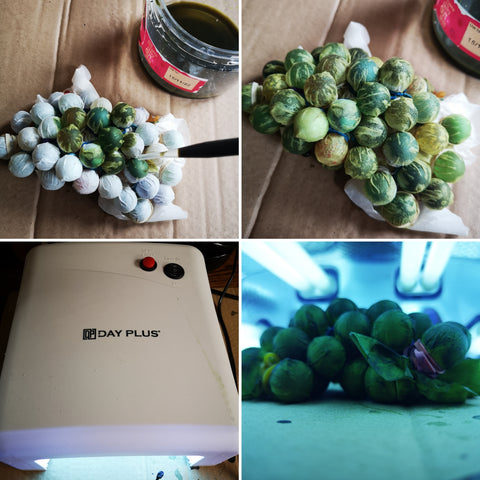
It wasn't at all sunny when I made this tie dyed piece so I improvised with a UV light I use for developing my UV resin. A mini sunbed for my cyanotypes!
Step 3
After a dose of UV for 10 mins or so I reapplied the cyanotype chemicals over the marbles but between them too this time then let them develop again.

Step 4
Remove the elastic bands and rinse.

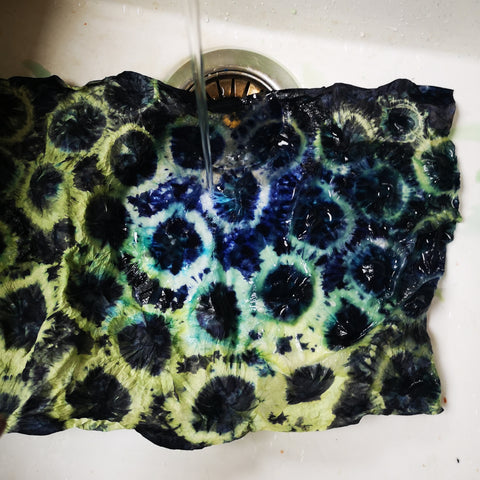

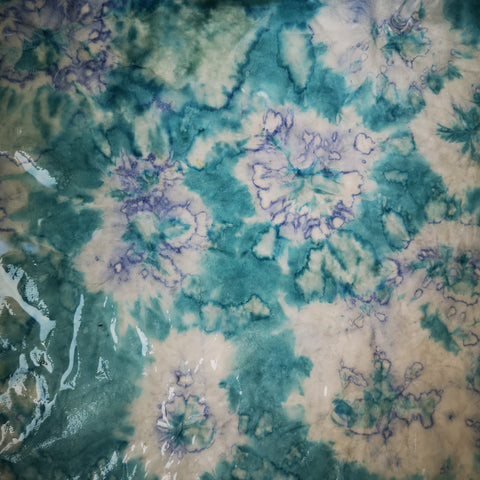
Final verdict
I love how different the outcome was with this piece even though it was the same pattern that was tied in the previous tie dye pattern. Just by adding the chemicals at a different point has given a different result.
FINAL Final Verdict and Lessons Learnt
I will definitely be revisiting this and trying new ways of tying and treating the paper. There are so many variables to try out with altering development times, using pretreated or non treated paper to begin, adding varying numbers of layers of chemical, spraying with water, leaving dry or adding vinegar. The paper withstood a lot of manipulation, there were no tears or rips despite the paper being stuck quite firmly to the marbles. The resulting papers will be great for collage papers.
If you want to have a go at something similar or have ideas of how tea bag paper could be used in your own projects then you can find it here in my online shop.